


Underwater photography used to be a hobby meant either for the very rich or very dedicated individuals. The gear was expensive, bulky and learning how to do it usually took extensive training over long periods of time. But the photography industry has grown over time, allowing for the emergence of inexpensive, user-oriented digital cameras. This made underwater photography accessible for anyone who has some elementary diving knowledge coupled with a waterproof camera. Continue reading this article if you wish to try your luck with shooting photos underwater.
Learn how to dive
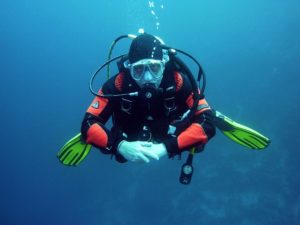
First and foremost, you need to know that in order to commit yourself to underwater photography, you need to have good swimming and diving skills. Mastering buoyancy is an important step towards shooting well-lit and composed images. You don’t want to crash into a reef while trying to get your shot or lose track of time and risk emptying the oxygen tanks. That’s why diving needs to become second nature, so investing in scuba diving lessons might not be a bad idea.
Get very close to your subject
Water is around 800 times denser than air and it absorbs some of the colors from the full spectrum light. This is why you need to get up close and personal and try to shoot with the minimum amount of water between you and your subject. By doing that, you avoid the risk of getting a blurry picture with dull colors and weak contrast. To do this, all you need to do is be as relaxed and as patient as you can. Make sure your breathing is calm and steady and always approach your subject with the camera already in position.
Don’t shoot downwards
Shooting upwards and towards the water, surface ensures that your picture contains more than just the seabed. Shooting downwards can only result in your subject blending in with the background and being indistinguishable from the surroundings. Also, pictures tend to look a lot better when taken from slightly below and towards the light source. That’s how professionals make those ethereal looking photos of marine wildlife. The only time you should shoot downwards is then trying to capture the backs of large animals, such as sharks or sea turtles.
Use the right exposure
As with all other types of photography, getting the subject properly exposed is crucial for making a good photo. This presents a challenge in itself, as water block a good deal of natural light, so underwater photographers need to use artificial lighting. That said, you can regulate the light that comes into the camera by adjusting the aperture, allowing you to “light up” the subject in the foreground. The best photographs taken underwater should transport the viewer directly into the underwater environment without realizing it was lit artificially.
Also check : OnePlus 3 Camera Review
Be very patient
Most people tend to do things halfway when it comes to underwater photography. What that means is that people generally don’t have the patience to spend hours in water preparing to get the shot. They quickly get bored and end up snapping only a handful of uninteresting pictures. The best course of action is to take a lot of photos while at the same time experimenting with different lighting and camera settings. Staying focused and patient is one of the key aspects when it comes to underwater photography.
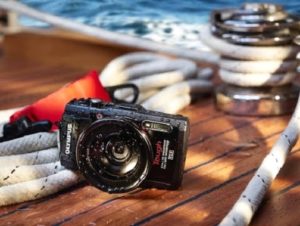
Choose the right camera and the right equipment
You’d be surprised how much you can accomplish with a simple GoPro. It’s waterproof, small, portable and very easy to use. If you want more control over your photography, then you should either get an underwater camera such as Canon G7X, Canon G16, Sony RX-100 II or Olympus TG-4. These are the top picks used by professionals worldwide, due to their outstanding performance underwater. If you already have a good DSLR and don’t want to invest in a new camera, then getting a camera case might be your best choice. But make sure you don’t go overboard, as some of these cases can cost more than the camera itself.
Try using a specialized filter to get that perfect shot
Filters are an excellent tool for underwater photography. They’re used in situations with bright light because they limit the amount of light going into the camera. They work exceptionally well in clear water and provide the pictures with optimal saturation. Filters are also preferable when shooting large animals, as lights can often have a problem lighting up every single detail. The only downside is that the filter needs to be installed on the camera lens, which will be spending most of its time inside a camera case, so once you’ve installed the filter, the only way to remove it is to go back to the surface.
Underwater photography can be a tricky business. It’s definitely a lot harder when compared to traditional forms of photography. Underwater cameras and camera equipment can set you back a pretty penny, but make sure you really want commit to it. Not only that, but you need to be in the water for long periods of time, setting up lighting and patiently waiting for that perfect chance to shoot. The best way to start making excellent underwater photographs is to practice and practice a lot.
Aside from primary area of interest and expertise in business consulting, Ian could be tagged also as a passionate sports fan, nature, and photography enthusiast, always trying to keep up to date with tech innovations and development.


Comment here